On this page i go into the two types of modeling, organic and hard surface. What this means is using polygon primitives to create something that has hard edges are a rounded out form or a combination of both.
The next two videos will show how create a stuffed animal which is considered organic in shape, and then a radio which would be more hard surface.
The next two videos will show how create a stuffed animal which is considered organic in shape, and then a radio which would be more hard surface.
Below you can visually go through the main steps I took to begin the model of the stuffed bunny. Box modeling is a technique that starts will general shapes and progressively adds geometry to define the model. This process helps keep geometry clean and efficient.
Starting out

I begin my model using a box and add some divisions so I can start rounding out the shape. The Connect tool is all I need at first.
Rounding out the Shape

Here I round out the shape by Scaling the edges. Rounding out is very important as a model can easily retain its boxy shape. Working in all the view ports to work the model over evenly is the best way to control the silhouette and remove that original box shape. Don't get too complex too quickly.
Extruding the Ears, Arms, and Legs

Select the polygons that match up with the reference image of where the ears are. Using the Extrude tool pull the ears up. Take time to define your work, but once again don't get to lost in detail just yet. The arm, and legs are created using the same tools. Look over the model in all view ports and adjust the geometry to follow the reference
The Inner Ear

Using Inset I start defining more of the ear. Select the front polygon on the Bunny's ear and click Inset. In this example I pushed the inner polygon out slighty to round the outer edge of the ear. I will eventually do this again to create more detail inside the ear, but first I want to mirror my geometry so I only have to work on one side.
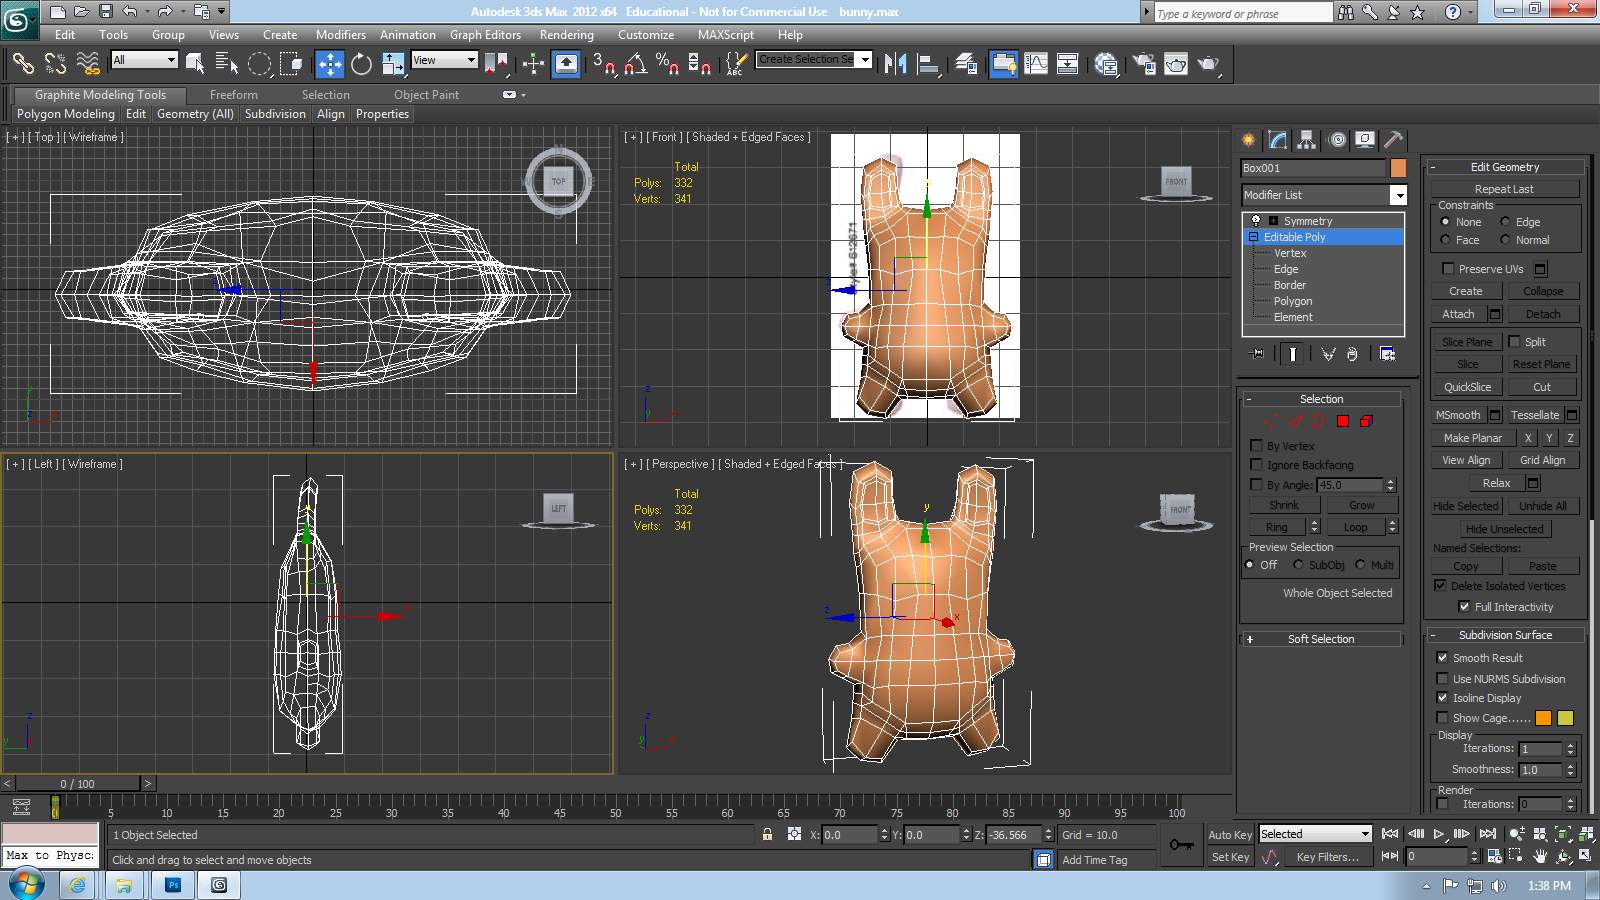
The Symmetry Modifier

Select Half of the polygons on the model and delete them. With the remaining half of the object selected (make sure it is the whole object not a sub object), open the Modifier drop down. Scroll down and select Symmetry. Remember for Symmetry to work properly in this case, the Pivot must be right along the inner edge of the model half. If it isn't, correct the Pivot under the hierarchy tab.

Once selected the Modifier will be added to the Stack. There are a few options to enable Symmetry. In this case, choose the X axis to mirror on, check Flip and finally click the display in view port icon. This icon must also be checked when working in Editable poly otherwise the mirrored side will not be visible. Click back to Editable Poly in the stack. Don't try to modify the geometry while Symmetry is selected.
Continue Refining the Model
Above, I have spent time adding detail to the model. Be careful of 5 sided or more polygons. If you look closely you can see I still have a few that need to be corrected. In an organic model, 4 sided polys are most ideal and 3 sided only if unavoidable. Save on poly count as much as possible. Only use enough to define the silhouette and necessary details.
Adding Detail with Boolean
Below the Boolean tool is used to create the eyes.

Create a cylinder. The default cylinder has a large number of vertical and horizontal edges, so adjust the parameters to a more reasonable number. My cylinder has 8 sides, and no horizontal edges loops. Keeping it round without wasting any polygons is whats important. Rotate the cylinder 90 degrees, scale and translate to match it up with the eye in the reference image. As you can see I am only creating the eye on one side. Once I have completed this step, I will again delete half my model and use the symmetry modifier to copy the changes.

With the eye placed, make sure it intersects with the main geometry at every point. If not, the Boolean will not create a complete intersection. Have just the main geometry selected at this point, not the eye and then return to the create tab and click the drop down. Below Standard Primitives is Compound Objects. Select this option and new tools will appear.

Click the Boolean and the options above will appear. Under Pick Boolean click the button for Pick Operand B. Select the eye. Automatically the main geometry will change. Different Operations create different effects. In my example, I used Cut to draw edges in the geometry that are defined by the cylinder shape. Experiment with other Boolean Operations, they are very useful and can speed up the modeling process when applied correctly.
Clean up the Boolean effect

With the shape of the eye created, I need to fix up the edges so I don't have polygons with more than 4 sides. Use the Cut tool to break up these polygons. Remember the Cut tool will make free floating vertices if it is not lined up directly with 2 intersecting lines. Carefully inspect the geometry to make sure you haven't added extra vertices. It is very easy to do with this tool.
Cleaning up geometry requires problem solving and patience.
Finishing up
